Instructions are for Mac Users. Windows users can find instructions in the blue/grey boxes.
Preparation
-
Duplicate your file so that your original, with all of the presenter notes, is not lost.
-
Download this file and save it somewhere you will be able to find it again in the future. (This is important!)
The file contains the code that will remove the notes from each slide with the press of one button.
For reference, this is the code that is contained within the file:
Attribute VB_Name = "NotesRemover"
Sub RemoveNotes()
Dim osld As Slide
For Each osld In ActivePresentation.Slides
With osld.NotesPage.Shapes(2)
If .HasTextFrame Then
.TextFrame.DeleteText
End If
End With
Next osld
End Sub
Step 1
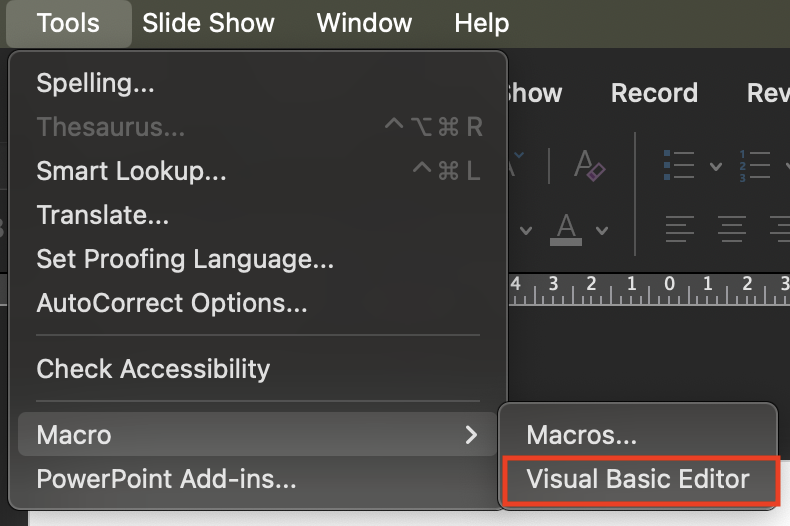
While in your PowerPoint file, go up to the menu bar and navigate to:
Tools < Macro < Visual Basic Editor
![]() Windows users: Press Alt + F11 to open the Visual Basic Editor.
Windows users: Press Alt + F11 to open the Visual Basic Editor.
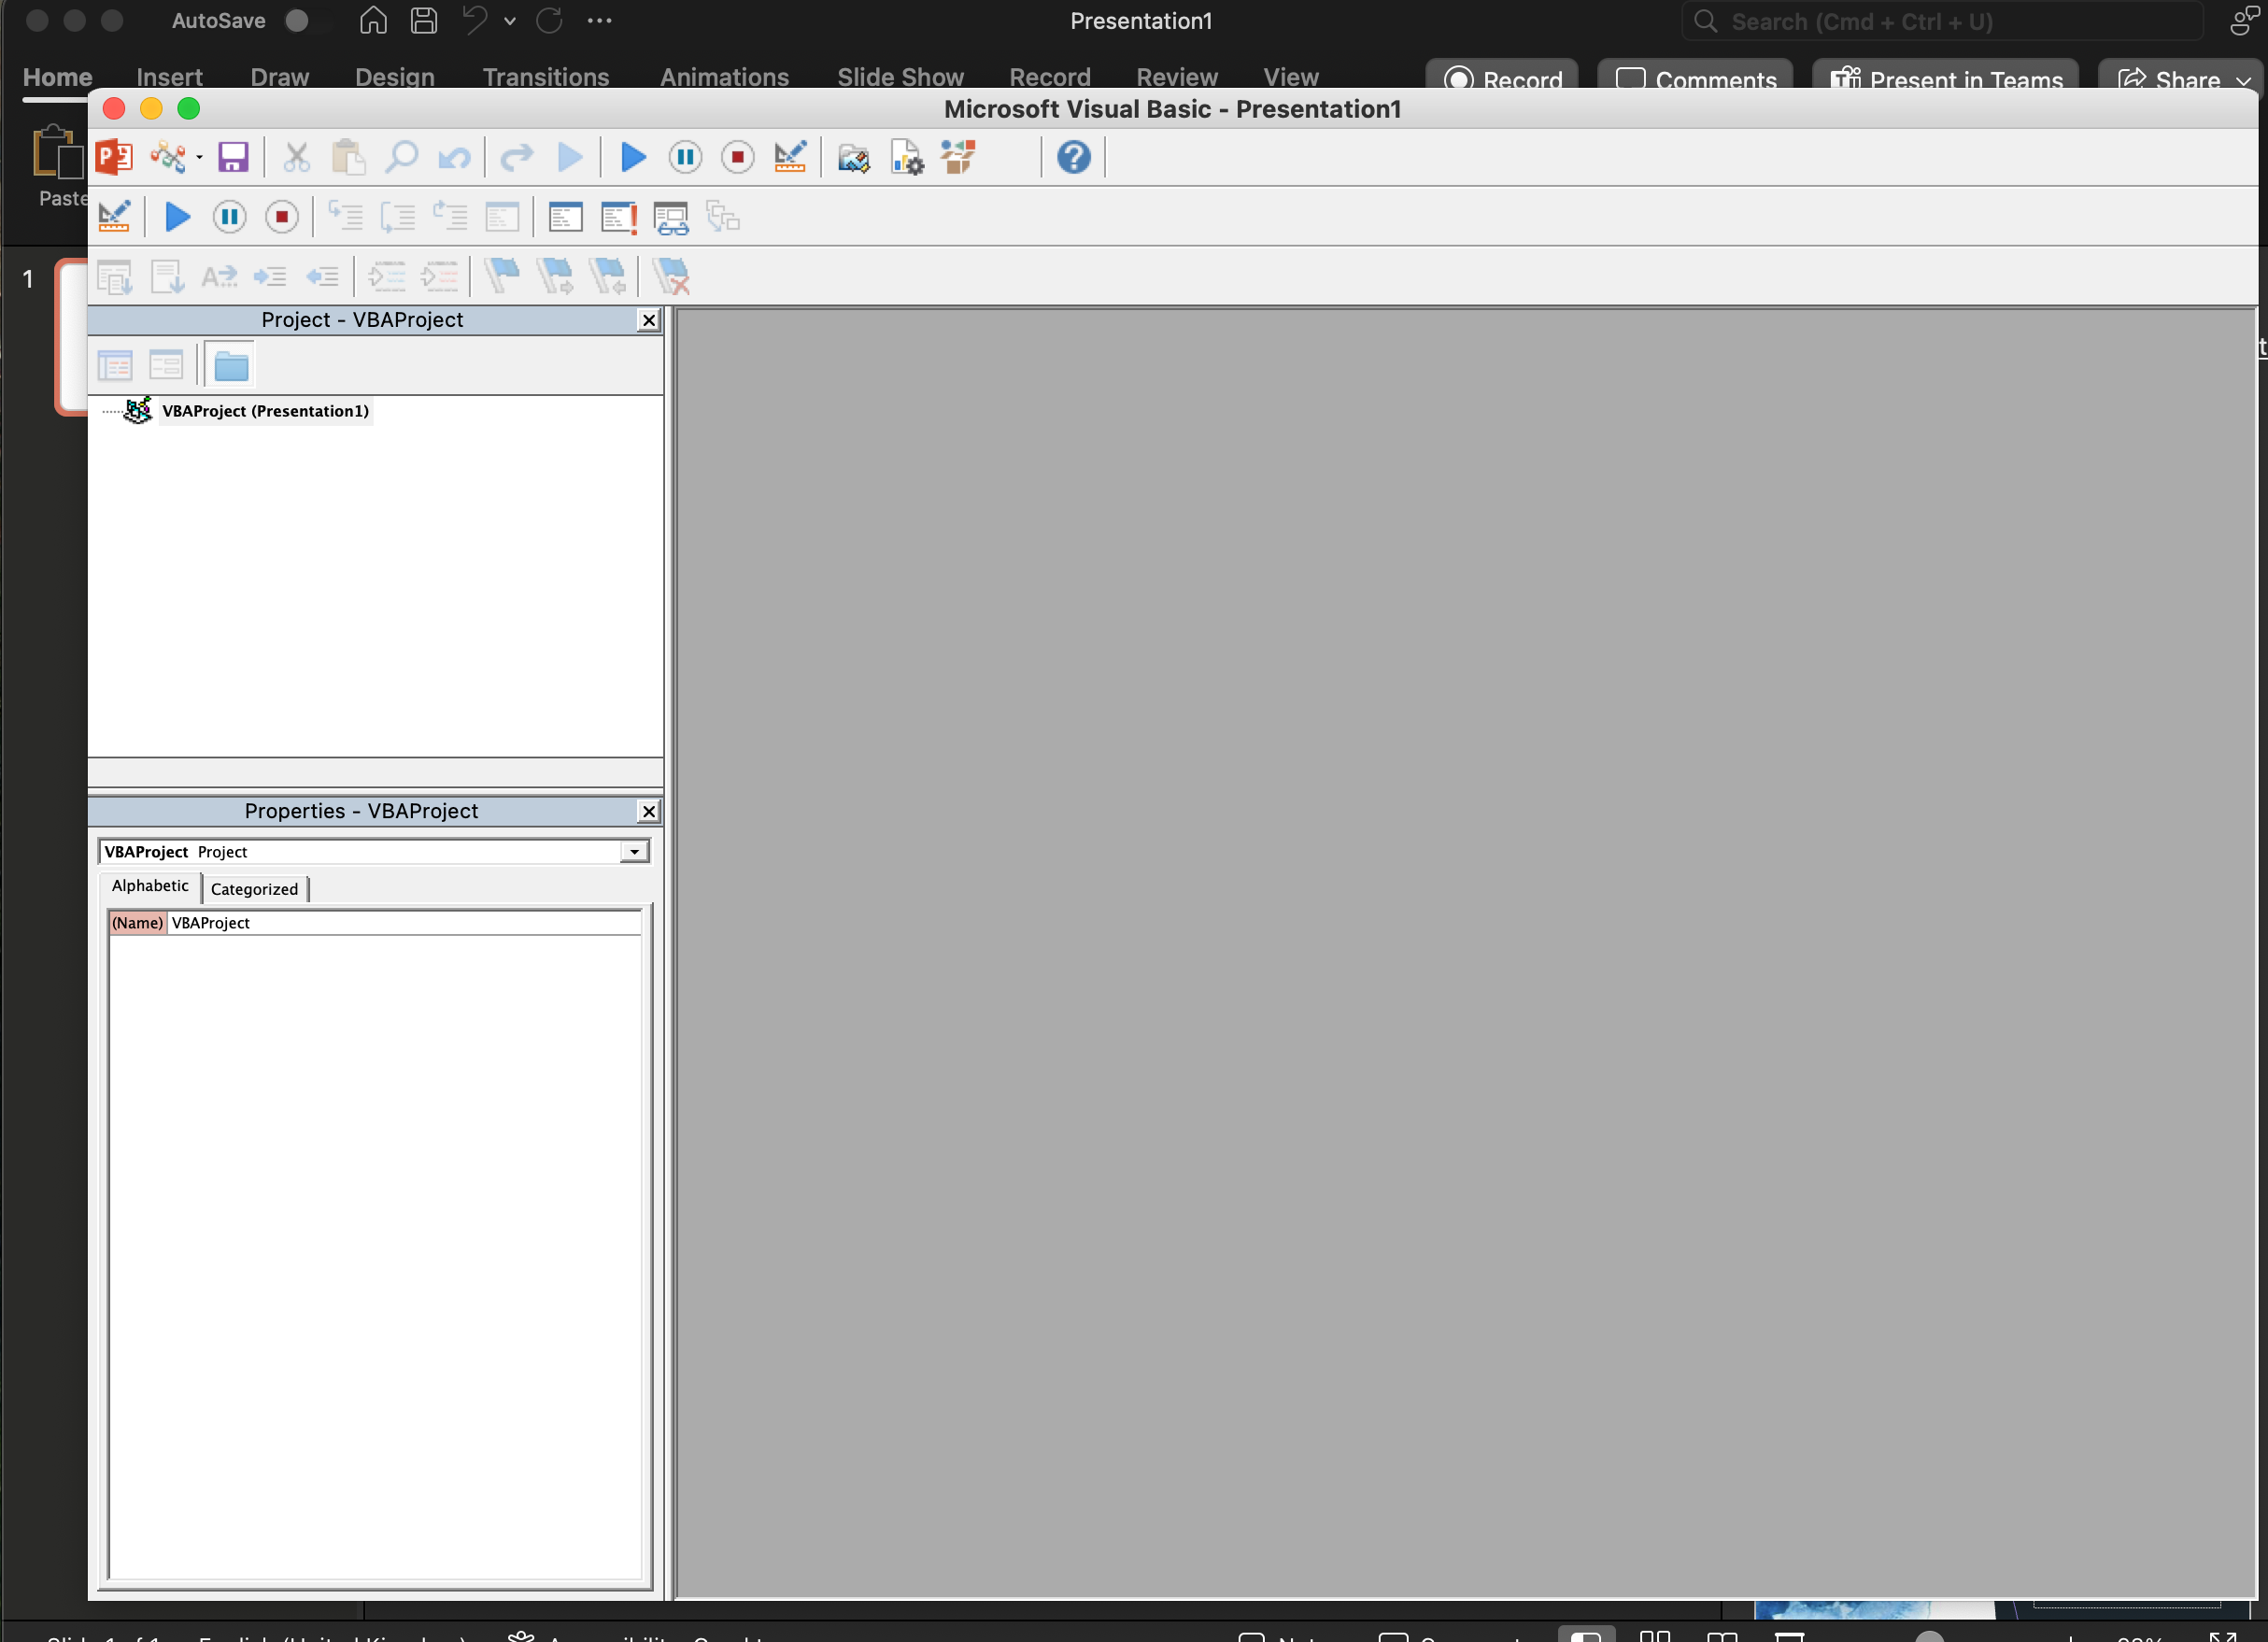
A new window will appear…
Step 2
In the menu bar, navigate to:
File < Import file…
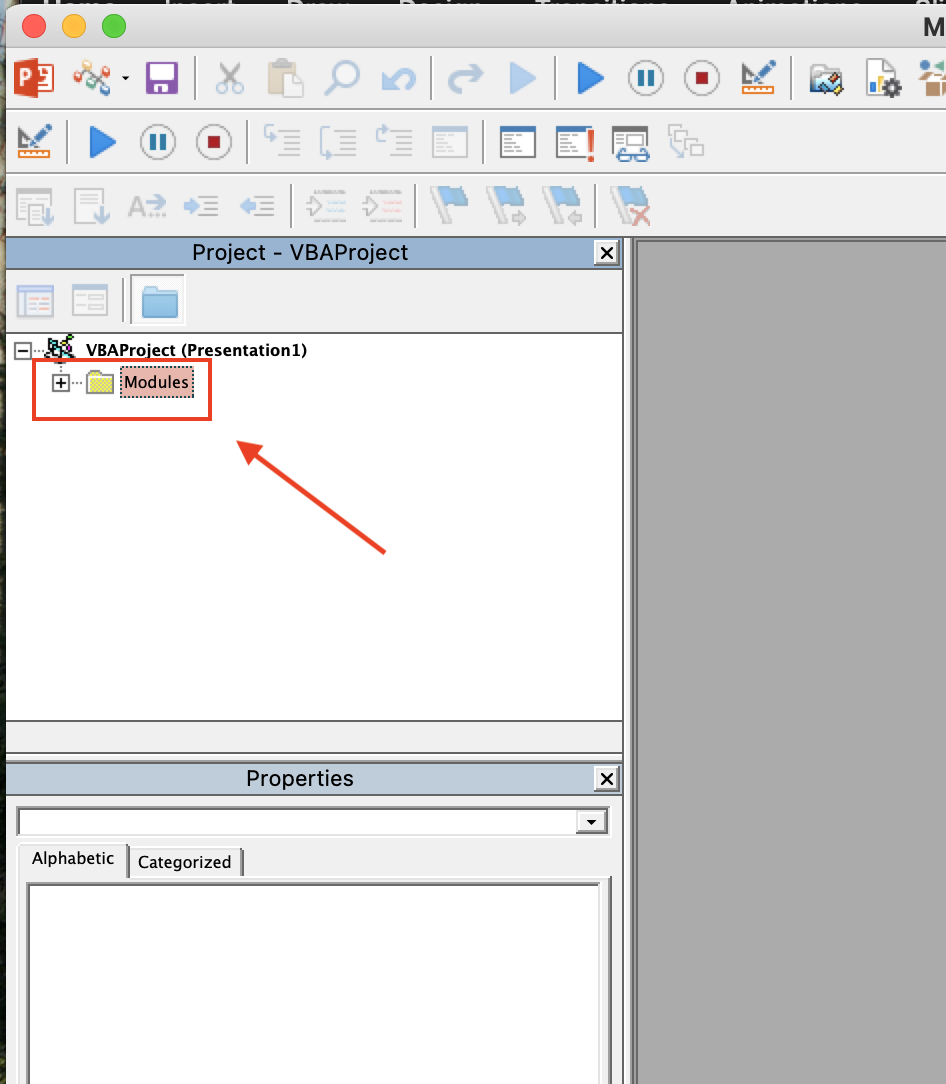
Locate the SlideNotesRemover.bas file you just downloaded, select it and press ‘Open’.
It may not look like much happened. But a folder called ‘Modules’ should have appeared in the Project Tree. This is good! The Macro is contained within this folder.
Step 3
Click the PLAY button, and ‘Run’ the RemoveNotes Macro.
![]() Windows users: This might look like a green triangle / play button. If you cannot find it, you can press F5 to run the Macro.
Windows users: This might look like a green triangle / play button. If you cannot find it, you can press F5 to run the Macro.
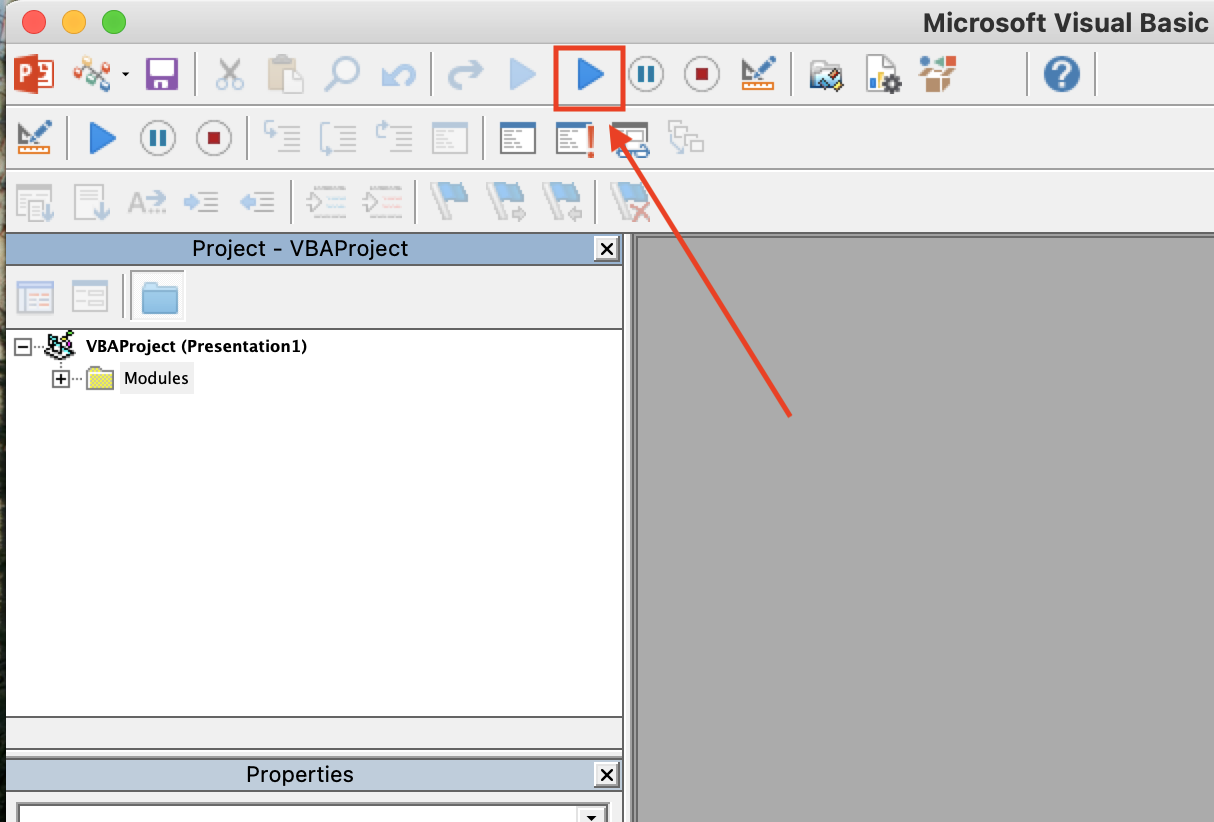
Again, it may not look like much has happened! BUT, close the Visual Basic window and you will find that all the notes have been removed from each slide! ![]()
One last note
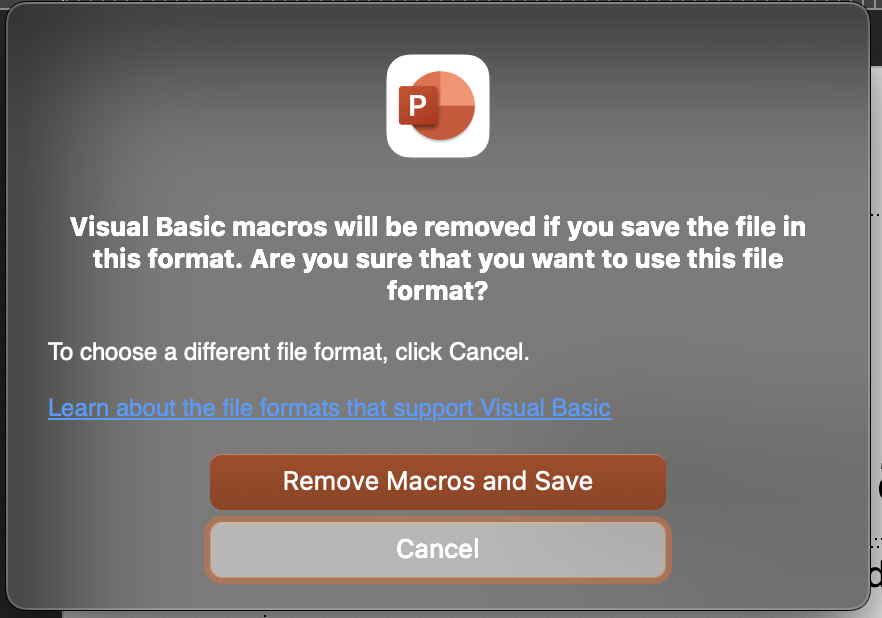
When you come to save your file, you will get an alert to say that the Macros will be removed, THIS IS OK as you have the Macro file saved already! You can press ‘Remove Macros and Save’.
![]() Windows users: You just need to press ‘Yes’ to the message that pops up.
Windows users: You just need to press ‘Yes’ to the message that pops up.
Leave a Comment
Your email address will not be published. Required fields are marked *